Welcome back to the blog today, I'm actually posting the challenge this week on time haha!!
We are onto week 4 of the Altered Puzzle Challenge
We are onto week 4 of the Altered Puzzle Challenge
Here are the links to the previous posts for this challenge
Our Facebook group is here:
This week, since we aren't worried about the pieces being flat, I decided to do some embossing and add some embellishments.
I started out with my first piece, painting the background a light brick sort of color
I then used embossing ink and two kinds of powder, I just dabbed the pad directly onto my puzzle piece here and there and added the powder and heat set
Once I was finished I wanted more so I added more....
This was how it was when I finished
I wanted to add a bird of some sort so I used a Dyluisions set and stamped my bird onto some patterned paper
I used clear embossing ink for the bird and cut him out
I added some ink and stenciling to the background
(guess I should have done that before the embossing, o-well)
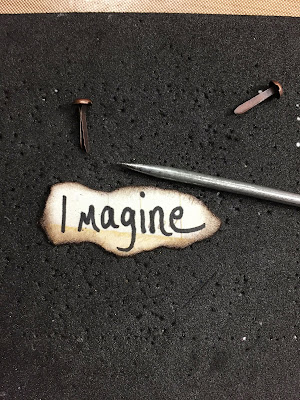
Next I wrote the word Imagine onto the same paper that I stamped the bird and tore it out and inked the edges with brown archival ink
I then punched a hole in each side of the word so that I could add brads
I adhered everything to my background and whalla!! I love the way this piece came out
For my next piece I used DecoArt media paint in a burgundy color
The color was a little bright for what I wanted so I added a bit of a darker color
After that has dried I used a stencil and black embossing paste to add some texture
I really love how that texture came out
I set that aside to dry
for the next step I glued some Tim Holtz paper onto cardboard
and used a butterfly mover and shaper die to cut out
I edged my butterfly with a black marker and I want my wings to stand up so I bent the butterfly right down the center a tad
Next, I grabbed some Tim Holtz ideology flowers and put them together with a brad
I'm going to use this in one corner of my piece
I stamped my sentiment onto that patterned paper and embossed and tore out
I also edged with brown Archival ink
I also wanted to use some pearls on my piece but I didn't want white pearls and that is the only color that I have at the moment. This is a perfect trick - Use your copic markers to color the pearls whatever color you want!!!
After my background was dry I added everything, I only applied glue to the middle of my butterfly here so that the wings can stand up
and here is my finished puzzle piece
I hope that you like the two pieces for this week, they are different but so fun!
This is what your first row should look like now... next week we start on the second row.
Have a great week everyone, see you next Monday!!


These are wonderful! What & where did you get the stencil you used for second (or 6th) piece?
ReplyDeleteLOVE this! They look so cool all together too!
ReplyDeleteThese are fabulous Claudine, it's going to be a really fun jigsaw xx
ReplyDeletethank for sharing the nice ideas .
ReplyDelete