Pages

Showing posts with label Canvas. Show all posts

Saturday, March 7, 2015

Her Soul Danced - Roc Nicholas Design Team Post

Welcome back to the blog and thanks for stopping by. Today is my day to post for the Roc Nicholas Design Team
I can't tell you how thrilled I am to be on this team, Roc's stamps are so fun and whimsical and I just love using them

By the way, have you seen Roc's new released stamps? 
Come by Stampotique and check them out, they are fabulous!


I started this canvas with acrylic paint and added a bit of white paint with a credit card over it


I then added loads of elements to make up my background, the black honeycombs is black embossing paste, applied through a stencil


For the row of houses at the bottom, I added words stamped with Roc's brand new stamp Roc's Tree
I also added flourishes around the edges of my canvas with Roc's stamp called Heart Vine

Here is a close up look at the row of houses


I then added my main images and Phrase


The two girls are stamps:

and the phrase is one of Roc's new stamps

On a side note - those beautiful wings are the art of Tanager Hammerface one of my wonderful artsy friends. I love her! You can check out her Facebook page here: Fairies and Finds She is amazing.

Thanks for coming by and make sure to check out all of Roc's stamps at Stampotique.com

Cheers!

Wednesday, October 29, 2014

Favorite Colors - Stampotique Challenge 171

Welcome back everyone, today there is a new challenge over at the Stampotique Designers Challenge Blog and our hostess this week is the super Nellie Van Leeuwen
She has chosen the theme, Use Your Favorite Colors
What a great theme! I am excited about this one!


For this challenge I chose to make a mixed media canvas
I used the Stampotique Stamps:

Paris Lamp PostFrench Journal Page, Comfort Zone all by artist France Papillon

My favorite colors are those of Fall, I just love the browns, oranges, reds and yellows that come with the Fall season and so I used all of these colors on my burlap panel.

(Oh my goodness, I just realized there is a moth sitting on my canvas in this photo haha!!)

Here is a photo of the tissue tape around the edges

I used metal butterflies for each corner of my canvas


I created a lot of texture in this background with embossing pastes, fabrics and paint.

Come on over to the Designer's Challenge Blog and join in on this challenge. You could be the lucky winner of a 30.00 gift card to spend in the store.
Cheers!!


Wednesday, February 5, 2014

Sister's Canvas

Good morning and happy Wednesday to you all.
Guess what?! Today is my birthday and I'm thrilled to be posting at the Stampotique Designer's Blog today. How cool that my birthday is also my day to post over there?

The Fabulous Jackie Payne is our hostess this week at the Designer's Challenge Blog and she is asking us to use a "Heart" in our art this week. We hope you will join us and link up your creation, you might be the winner at the end of the month!!

For this week's project, I made a canvas for one of my daughter's. I am using Stampotique Stamps:
Seaweed - By Jo Capper-Sandon
Tenticurl - By Jo Capper-Sandon
Stacked Love - By Roc Nicholas

I had a great time putting this little canvas together, here are a few of my steps:

First I decided to use a small Tim Holtz burlap canvas, this one has an awesome background but I'm going to cover it up


I used this great textured, almost fabric paper for my background

I just tore the edges to fit my canvas

I also used one of my daughter's photos from Christmas this passed year, they had posed in front of our tree
I wanted a brown/cream vibe for this project so I decided to have my photo printed in the Sepia tone instead of color
I tore around the edge and inked it up with Wendy Vecchi Archival ink

For my Stampotique stamps, I embossed each image with black embossing powder. I cut out my seaweed and tenticurl images so that I could place them on the sides of my canvas
I decided to leave my "stacked love" image alone and not color it, I think it blends in well this way


I created some flowers with my Tim Holtz movers and shapers tattered floral dies and of course I had to ink up the edges
I also used some ribbon that I had stained with distress stains in various colors
I used a Tim Holtz Tag Label to create a "sisters" charm
Check out my finished canvas


I hope you like it as much as I do, thanks again for coming by the blog and have a super week!!!
Cheers!!


Thursday, September 19, 2013

Capture Life's Moments Fall Canvas


Hello Bloggies!
Over at the new Simon Says Stamp Blog they have challenged us to Stamp on Something Besides Plain Paper.
It's easy to stamp on plain paper but they are challenging us to stamp on something different this week. 
I actually love this challenge, it really took me outside my comfort zone. 
I decided I really wanted to do a Tim Holtz canvas that I had bought awhile back and just never used. (this happens a lot)


I also decided to use my Wendy Vecchi white modeling paste and a honey comb stencil. For the upper left hand corner and the lower right hand corner I simple tore up a paper plate and glued it onto my canvas. I figured, what the heck! haha! I set it all aside to dry.


After all was nice and dry I used a text stamp and archival ink to stamp here and there onto the paper plate and canvas portions, I wanted this to dry thoroughly so I set it aside for a bit.


I wanted to do a fall themed canvas so I stamped a Tim Holtz blueprint leaf stamp onto watercolor paper and colored it using distress markers and my water brush. 


I then simple tore the edges around my leaf and edged them with distress ink.

Next I used my Ranger Adirondak color wash sprays in various colors and, without using water, sprayed them directly onto my canvas. 


They came out beautiful


Once that was dry I edged my canvas with black soot distress ink, this gives it a more finished look and brings your eye in

I also added a bit of shimmer with various colors of perfect pearls.

You can kind of see the nice shimmer that the perfect pearls gives the stencil and paper plate.


Lastly, I added a word plate that I colored a bit with gold paint dabber. 


Then when you put it all together, this is what you get....


Almost forgot... what would a project be without a butterfly? I added one in the upper lefthand corner.


Thanks again for stopping by, may your heart always be full and your cup runneth over. :)


Thursday, April 25, 2013

Follow Your Heart


What a beautiful day it is here. My husband and I went on a 2 mile walk and all the flowers are blooming, Spring has definitely sprung. 
I wanted to work on a project inspired by all the beautiful color and flowers that are popping out everywhere. I also wanted to do a few challenges while in that process. (you know me, loving my challenges). 
I am entering this project into the following challenges:

Simon Says Stamp and Show - Their challenge this week is, none other than, COLOR.. yay! They are also giving away a 50.00 gift voucher for the shop to one random winner.

Eclectic Paperie  - Their eTeam Picks challenge this week is Flowers! Woot! They are giving away a 15.00 gift voucher to their online store. 

Ink On My Fingers - Hels Sheridan's Sunday Stamper challenge this week is "Paper," I actually used different kinds of paper in this project.

This is only my second canvas, ever. For some reason I'm so intimidated by the thought of creating on canvas and I'm not really sure why. I guess that's why I have taken this long to actually do something on a canvas. 
I like it, I really, really like it. I might have to do more of these.
Anyway, for starters on this I laid down some plain white tissue paper and some Tim Holtz tissue paper. I used Claudine Hellmuth's gel medium to adhere that to my canvas.


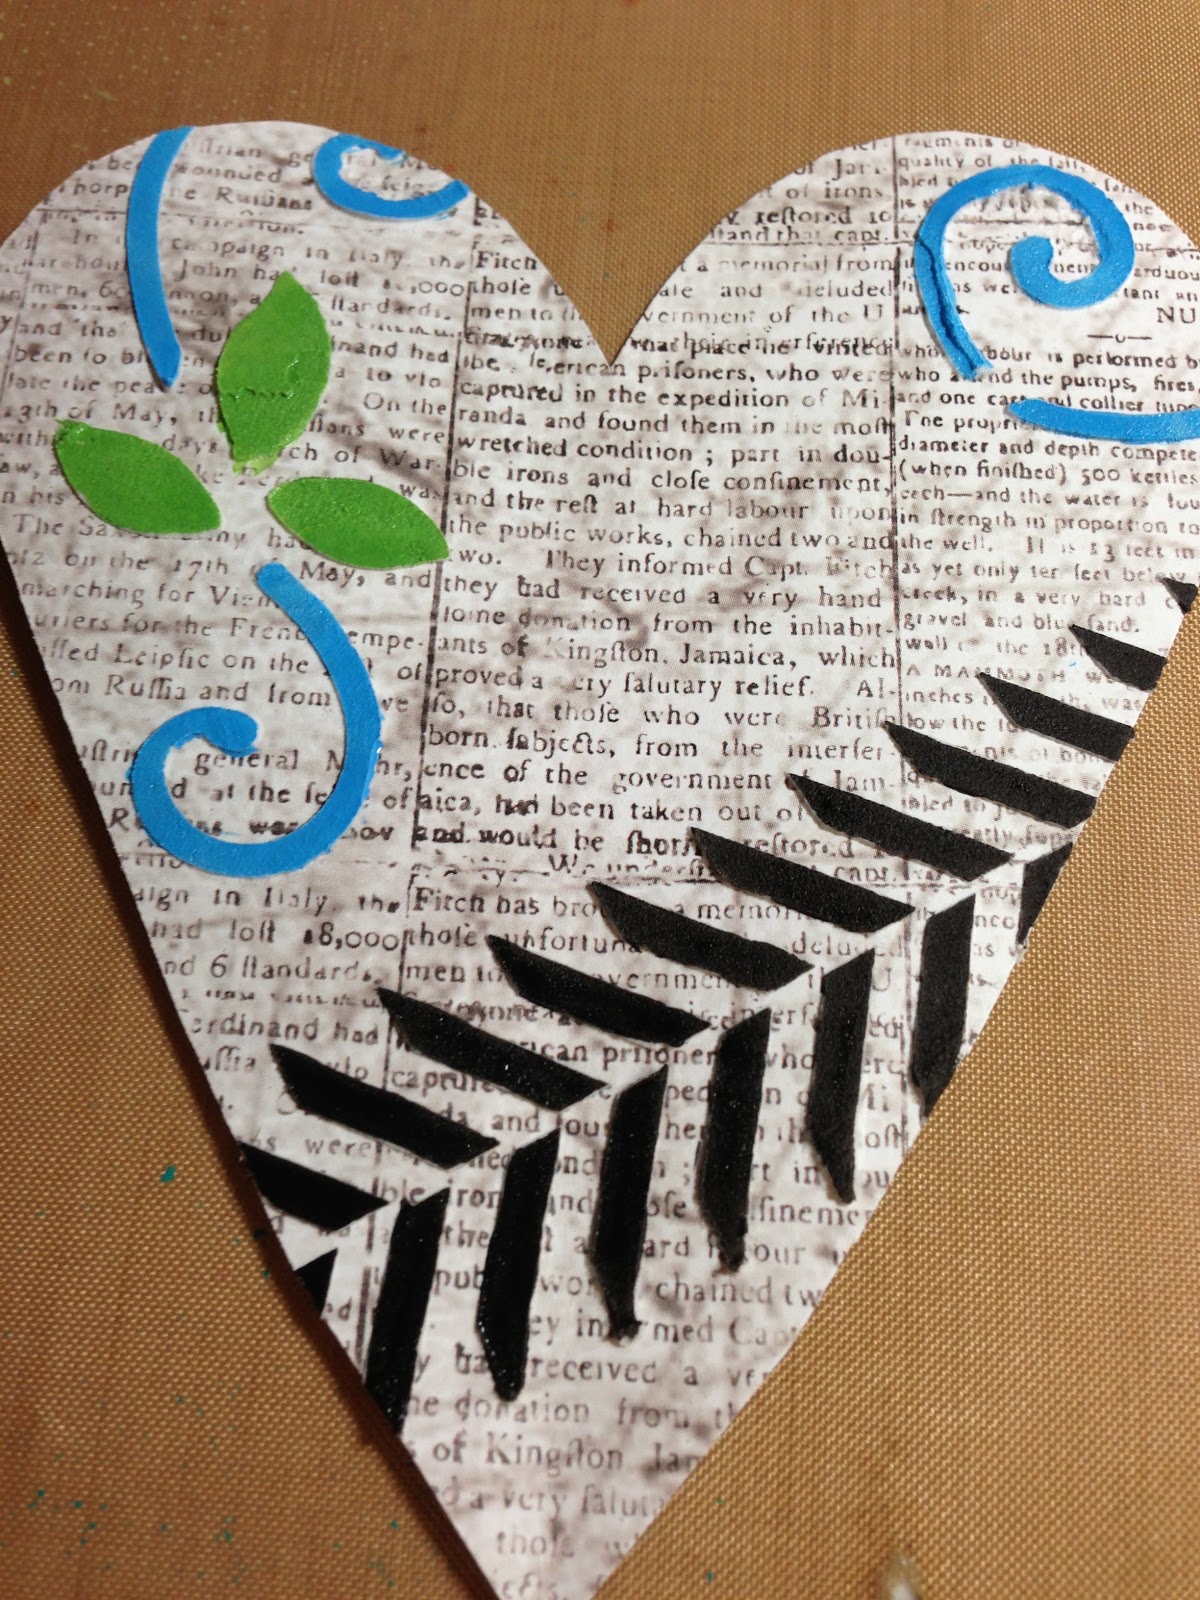
I set that aside to dry and then I used a piece of paper with writing on it to, free hand cut out a heart.
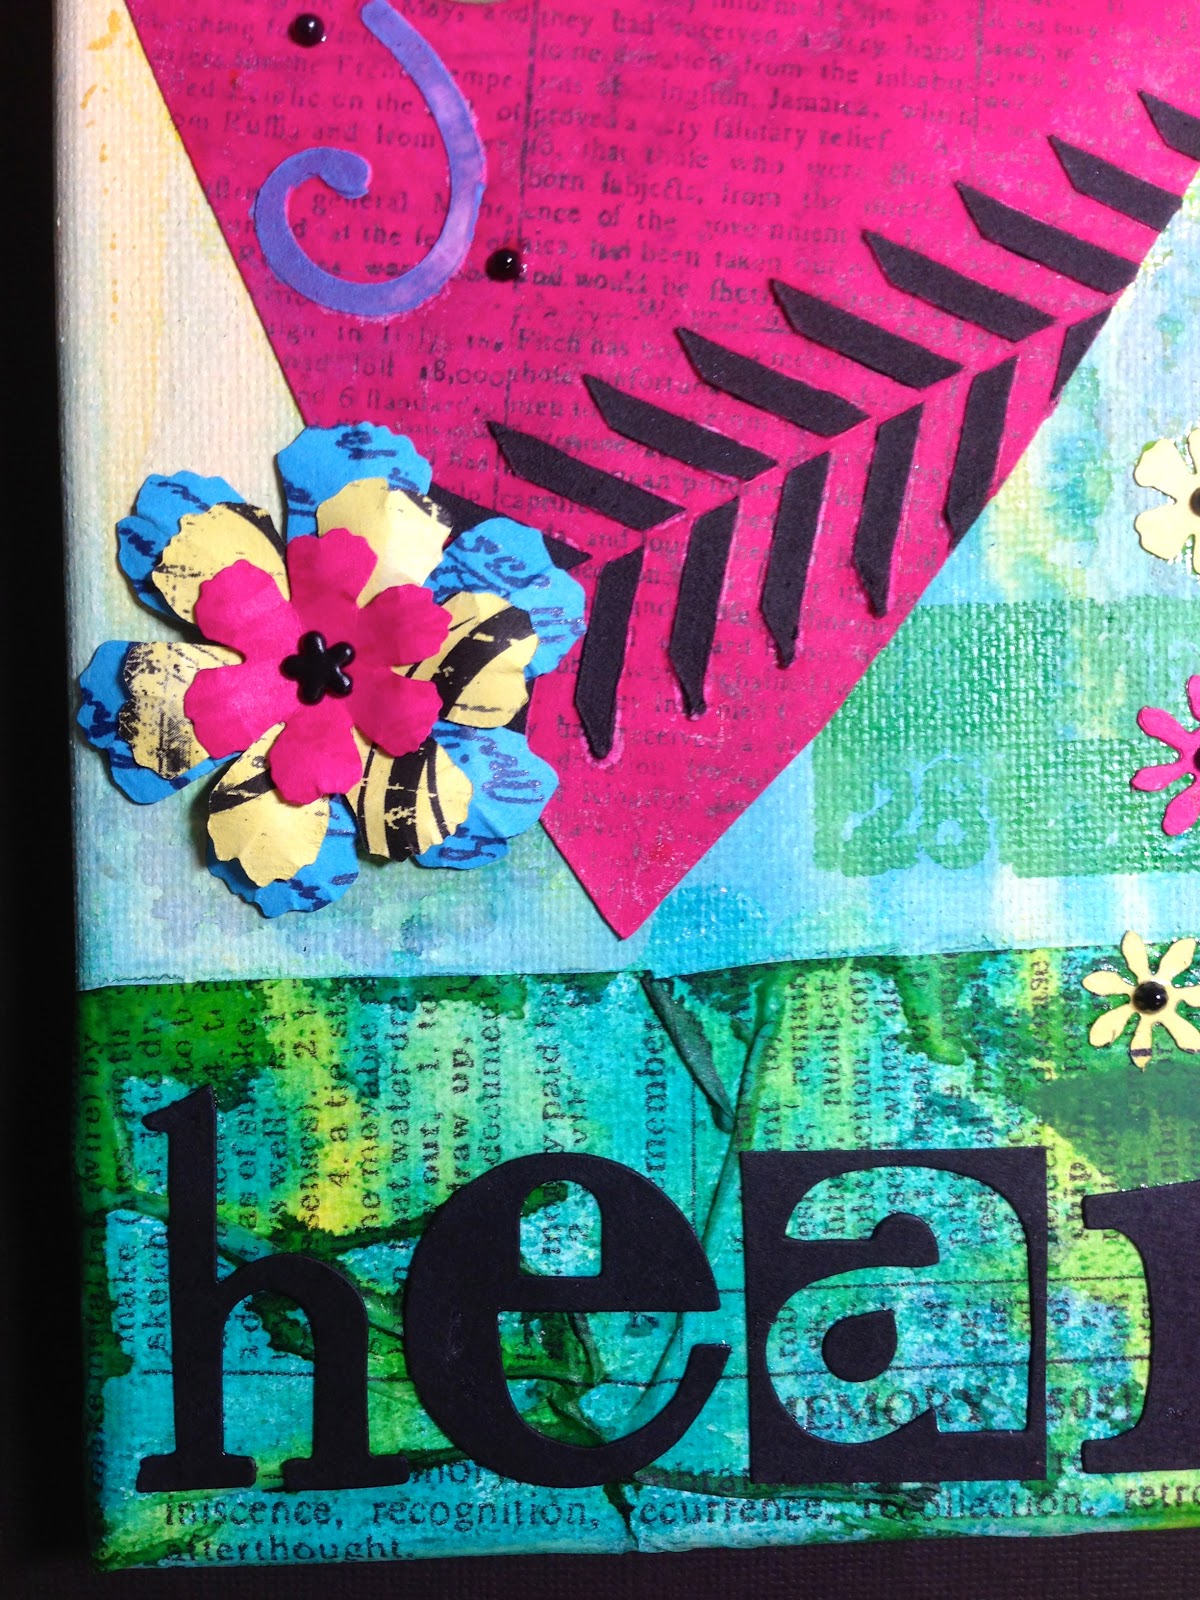
I used Wendy Vecchi white Embossing paste and a stencil to add some swirls and arrows to my heart and then set it aside to dry.


I then used a Wendy Vecchi Leaf stencil and some paint to paint some leaves onto the low corner of my canvas.
I am using a technique that my friend Anita Houston has talked about quite a bit. I have been wanting to give it a try.
By painting with Tim Holtz Distress paint and then spraying Dyan Reaveley sprays over it, the paint resists the spray and comes through, it's really neat. I didn't have the exact color I wanted in Tim Holtz paints so I used one color of regular acrylic paint.


I then Sprayed my canvas with three different colors of Dylusions Sprays. You can see that the paint comes through, it's awesome. I also love the way that the Tim Holtz tissue takes the color so well. I kind of just let the sprays drip down to the bottom.


Next, I painted the embossing paste designs that I had put onto the heart with distress paint.
I then sprayed the heart with Dylusions spray.


The same effect happened, although the green came off a bit so I repainted it once everything was dry.


I wanted to use this black and white Creative Memories paper to make some flowers but I wanted it to be a yellow color. I simply took out my distress stain in Squeezed Lemonade and stained it. I love how I can simply do this with the stain to change the color of paper.


 I used Tim's tattered flower garland strip die to cut out some flowers. I shaped those flowers with a pencil and some foam.


I then stamped onto each flower with a word stamp and Archival ink in coordinating colors.


I also used a few stamps from Wendy Vecchi and Tim Holtz to stamp onto my background prior to applying everything.

I used the Tim Holtz Word Play large Sizzix Die to cut out my sentiment. (one of my favorite dies)

Here is my finished project.


 Love the embossing paste


This sure was a fun project and I really like the outcome. Not too shabby and so much color. 
I hope you have enjoyed the tutorial for today. It's your turn to try a canvas :)
Thanks for stopping by.