Pages

Monday, November 25, 2013

The Twelve Tags of 2013 - November

Hello everyone, today I wanted to share with you my project for this month's tag. As many of you know Tim Holtz is doing his 12 tags of 2013 again this year and he does one a month. We are now into the 11th tag for November. 
I am also putting together a 7 gypsies tray, one ATC sized project for each month of the tags. Tim's tags always always so much fun to do and he always gives us a fun technique.
You can go over to Tim's blog HERE to check out the full tutorial and details. 
Here is my project for this month....


My tray is almost finished, only one more slot to fill. I cannot wait to finish it and hang it in the house. So many fun techniques and projects to see and look at here.
Thanks again for stopping by, have a great day.

Friday, November 22, 2013

Splat Away

Howdy everyone, today in Colorado it is quite snowy with a mix of wind and very cold temps. It's one of those days where you just want to stay inside and drink some hot cocoa. 
I have decided while I'm stuck in the house, I may as well do some crafting. 

For today's post I wanted to take part in the Stampotique Designers Challenge
They are challenging us to "Add a Splat of Paint" in our creations this week. How fun!! I just love splattering paint on whatever I'm working on. 

I started out with a piece of manilla card stock and white paint and my paintbrush

All I did was dip the paintbrush into my paint and flicked it onto my paper. This gives a splattering effect onto the background


Next I used my Tenticurl Stampotique stamp by artist Jo Capper-Sandon and embossed it in several different colors, I then cut them out


I didn't take a photo of this part but I used my Stampotique stamp Girl with Heart Purse by artists Jill Penney and Daniel Torrent and stamped her onto white card stock, I then colored her with copic markers and cut her out

I used my tenticurls and my girl and laid them out where I wanted them on my background


Once I figured out how I wanted them, I glued them onto my background and then cut it out.
I added a few other colors behind the manilla card stock and also added a sentiment. 
This will make a cute card for someone special.


Thanks again for stopping by, I hope your staying warm and cozy, I know I am... haha!! 
Have a great day!!

Thursday, November 21, 2013

"Joy To The World" Christmas Postcard

Hello there everyone, today I have a postcard for you. This one was a little different for me because I didn't use any stamps, inks or stencils. You know how I love those and use them in almost everything I do. I did use a tiny bit of paint I couldn't resist. haha! 
Well for this particular postcard I decided to use some of my fantastic Memory Box dies. They are so intricate and they have so many to choose from. 


For starters I got out my dies and picked out a few I wanted to use.

I had cut the mini row of houses onto my red paper, making sure that there was overlap so that it wasn't cut completely out. 
My card looks crooked here but it's perfectly straight I promise. haha! It's because it's sitting on this grid pad.


I then cut a piece of white card stock to use as a template so that I could cut a window into my card. 
(there might be an easier way to do this but this was the quickest and simplest way for me)


I then used my Xacto knife to cut around the white piece of card stock and ending at the edges of the row of houses.


The ending result should look like this..


Once that is done cut another 4x6 piece of white card stock for your background and lay out your other items to see who you want your postcard to look.


I decided I wanted something in this background to sort of look like snow flurries so I used two colors of Tim Holtz distress paints. I just used my paintbrush to dip into the paint and splattered it across my paper here and there.


Once that was all good and dry...
I then glued my piece of red card stock on top of that and edged   it all with Archival black ink.


I then used glossy accents to glue everything onto my postcard and whalla!! Here is the end result....


I ended up making three of these, two to send and one to keep.

Thanks for stopping by today, it snowed here in Colorado so I will most likely being staying home and crafting again today. YAY!!!
Have a good one!!

Tuesday, November 19, 2013

Only One Layer

So this week over at the Stampotique Designers Blog Samantha Read is this week's host and she is challenging us to only use One Layer.
Being the mixed media person that I am, this challenge was very difficult for me. I do, however love a challenge.
I almost missed this challenge due to "life" being very busy this passed week but I was determined to get this one in.
I decided to make a card and since I'm in a time crunch I didn't take very many photos of my process but luckily since it's only one layer it was simple.
I used a piece of white card stock to start and some Distress Stains in various colors. 
I love my Relaxin' girl stamp from Stampotique and artist Jill Penney and Daniel Torrent so I decided to use her for this card.
I stamped her in jet black ink onto my white card stock and then used my distress stain dabbers to just splat the stain onto my card. Sort of like dabbing a bingo card but a bit harder so the paint splatters


I then colored my "relaxin girl" with distress markers

I wrote my sentiment onto white card stock and edged them and also my girl with black archival ink.


Like I said, one layer is so tough for me but I like the way this card came out. 
Thanks for stopping by, this post is short but sweet. :)
See ya next time.


Friday, November 8, 2013

Gesso in the Background

Good morning to you all, how is the day treating you? For today's post I have some gesso fun going on. The challenge over at:
Stampotique Designers Challenge this Sarinda is challenging us to "Using Gesso" 
What a great challenge! 


I have used gesso before in many ways but I really wanted to
try it on some pre-printed background paper.
My intention was to use the gesso and then color it but once I got it onto the paper I loved how it look in it's raw white form so I just left it.
Here is my process:

First, I used a really super cool 7gypsies sheet of paper with numbers all over, and used one of my stencils for the gesso.
All you do is use your pallet knife and smear some gesso through the  stencil. 


Once that was dry, I used my prismacolor black pen to go over some of the honeycombs:


I then chose my Stampotique Prom Queen stamp by designers Jill Penney and Daniel Torrrent, isn't she lovely?
I stamped her onto separate paper, heat embossed her and colored her with distress markers. 


Once she was done, I fussy cut her out leaving a tinge of the white on the edges. 

For the flower I used a stamp by Jo Capper-Sandon called Tenticurl
For this application I just took a bit of the gesso and put a little onto my finger and rubbed it onto the stamp
Working quickly I stamped here and there onto my flower. I set that aside for a bit to dry. Gesso dries quicker than embossing paste so it didn't take long. 
(please clean your stamp thoroughly after using gesso onto it, as gesso can ruin your image on your stamp if you allow it to dry)


I then took my paint dabber in pitch black, and dabbed the color onto he flower. At the same time I dabbed a baby wipe over the gesso, this allows that gesso to show through the paint. It's so cool how the gesso shows through here.


For my ribbon, I died it with distress stain and then used my Spider Wings Stamp (by artist Daniel Torrent)
and just stamped  here and there onto the ribbon. 


Once all that was done, I just put my project together....
Here is my finished card...


I hope you enjoyed the tutorial today, it's been awhile since I've used my gesso and what fun!!
Thanks for stopping by


Thursday, November 7, 2013

Using Texture Mediums and Stencils

Good Morning everyone, today I have a tutorial for you over at 
This month at Unruly it's all about stencils and using your stencils in different ways and on different surfaces. 
I have put together a journal page for you using my stencils and  Liquitex Modeling paste.
I hope you will go on over and check it out.
Here is a link:

And here is a sneaky peak....


Wednesday, November 6, 2013

What I've Learned ......

Being a military wife and moving around as much as I do, I have learned that no matter where you go or what you do, "There is No Place Like Home".  


For today's project I wanted to take part in a few challenges and also challenge myself a bit. 
For the challenges, I'm including this project in these:

1. Frilly and Funky - The challenge is "Thanksgiving" and Lord knows I'm thankful for my home and my family

2. 613 Avenue Create - Their challenge is "Anything Goes"

3. Challenging myself to create something for teaching a class of my own. (this is a huge step for me)

So to begin this project I had gotten my gesso out and was using it for another challenge (that will post tomorrow) so I decided to use it on a 5x7 canvas.


I used the gesso through a stencil and set it aside to thoroughly dry.


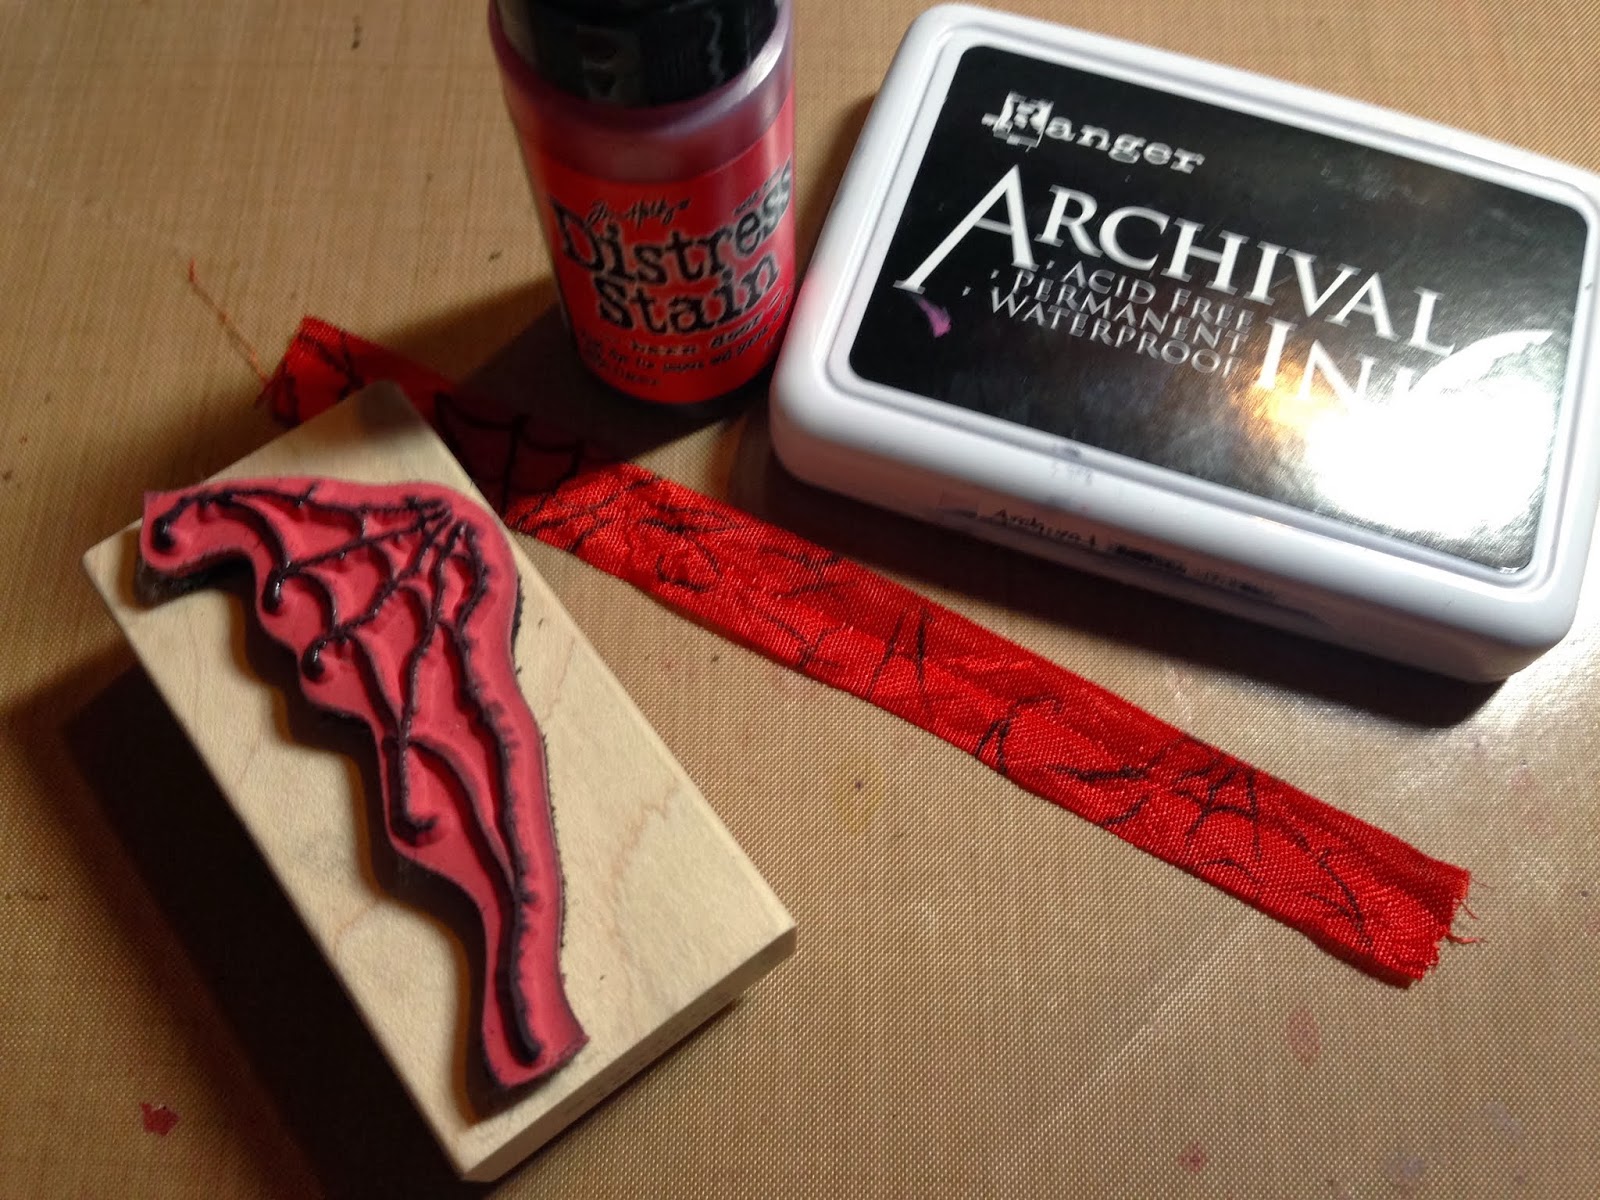
While the canvas was drying I stamped some Dyan Reaveley stamps onto a separate sheet of paper. 
I colored them with distress stains by dabbing some onto my craft sheet and using a paintbrush to color the houses.


I also did the same with some mushroom Dyan Reaveley stamps and then I sprayed each item with Goosebumps spray to give them some texture and sheen.


I set those aside to dry. 
I then took some flowers and used distress stain to color the red one. (it was previously white) I then sprayed those with goosebumps and added a black button to the middle of it.


Once my canvas was dry, I used some (Tim Holtz) distress paint  and smeared it onto my craft sheet, spritzed with water and ran my canvas over all the colors. I sprayed my canvas with water as well. 
I wasn't too sure about the colors so I added the green


Once that was dry I used my archival ink to go over some of the brick stencil to make it pop just a tad.


I love how the gesso adds the texture to the background. 

I didn't take a photo but I used a Dyan Reaveley stencil and black archival ink for the borders, I just love how the leaves came out on the background!
I also took a stencil of the one house and used my Prismacolor pen to outline that one house. This way it will pop just a tad more.


Once everything was created and done drying I added everything to the background. 
What do you think? 


A close-up of that gesso'd brick background


Sorry for the difference in lighting in the photos, my studio has such different lighting than the rest of the house.
Lighting in my studio is on my Christmas "wish list" haha!!
Although I won't be using this exact design for the class that I hope to teach, I will be doing something very similar. Wish me luck!!
Thanks again for stopping by, I hope you have a great day!!