Pages

Showing posts with label Adirondack Ink. Show all posts

Tuesday, June 23, 2015

Altered Puzzle Challenge Week 9

Wow, can you believe that it's already week 9 of this challenge? Amazing how time flies! It seems like I just began the altered playing card challenge and here we are on another challenge into week 9 already. 


Here are the links to the previous posts for this challenge


Our Facebook group is here:

At any rate, Sunday was Father's Day but it was also mine and my husband's 18th anniversary! Time really does fly!!

This week I started with the two pieces and used distress stain in two different colors directly onto the background


Next I applied a darker color of ink around the edges of each piece


I then applied an even darker color again around the edges

I love how the colors graduate from darker to lighter towards the middle

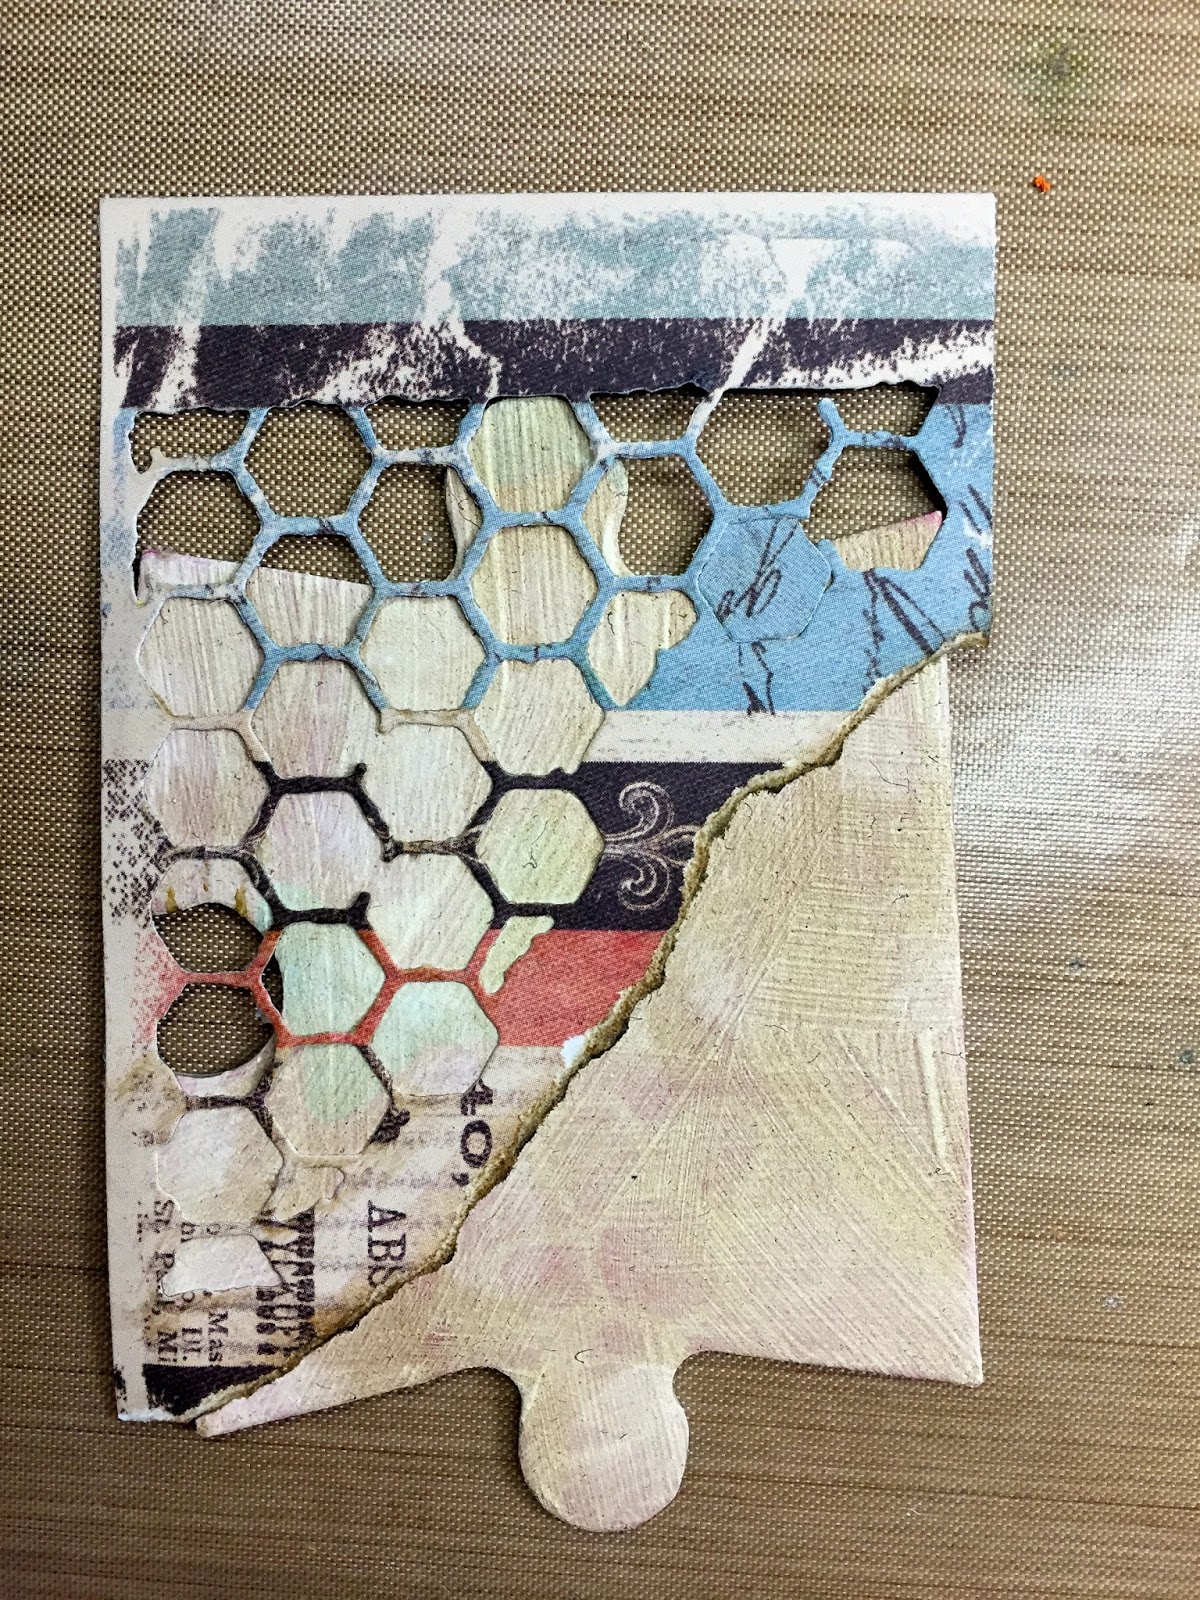
Next I decided to use a stencil and two different crackle pastes, one is a white paste from Wendy Vecchi and the other is a clear crackle paint


This is the stencil I am using for both of these


I simply used a pallet knife to apply the crackle mediums through the stencil


This is what they looked like after application


Set both aside to dry thoroughly, I left mine for a few hours while I ran an errand

When I got back home they both looked like this... look at that crackle! So cool... I love the way the distress stain color bleeds through the crackle mediums.


Working with the brown piece I stamped this weed stamp onto my background. This is from an older Tim Holtz set, I also used this set for my images


Once again, I forgot to take photos of the next steps BUT, all I did was stamp butterflies onto white card stock and colored and cut them out and applied them to the top, I also just stamped my sentiment (Dylusions) and cut it out and added it
Here is my finished first piece (I love this one!)


For my blue piece, I only added a sentiment, I wasn't sure if I wanted to add anything else
I might add something later but for now I like it as-is


Here are the two pieces together


and the full puzzle so far, what do you think?


Again, sorry this post is late, I hope you enjoy making this week's pieces....

Have a great week!!!

Wednesday, June 10, 2015

Altered Puzzle Challenge Week 7

Oh my goodness, I am so sorry that I'm late this week with the challenge. I have been working and running errands for my household. Not to mention doing some things for my mom and extended family too. It's just been busy and time has definately gotten away from me.
Welcome back anyhow and thanks for coming by the blog again.

We are on week 7 of The Altered Puzzle Challenge


Here are the links to the previous posts for this challenge


Our Facebook group is here:

We are using pieces 11 and 12 this week and starting with the first piece I simply painted the background with black acrylic paint
I then used a die from Tim Holtz that I just got the other day to create a stencil


I used two of the dies to create these two, I will use the pice on the left on the 2nd puzzle piece. For now we are going to focus on the black and white piece.


Originally I wanted to glue the paper directly onto my background but I didn't really like it so I used the cut out as a stencil to add paint to my background


I simply dabbed white paint over the die/template and created this cool background, I set that aside to dry


I then used a Stampotique stamp to create my boy and colored him with copic markers. Adding a sentiment (also a Stampotique stamp)
This piece was pretty simple to create, a few tweaks and boom, your done! 


For my second piece I colored the background with Adirondack ink in a light shade


Next I added my paper that I used the Tim Holtz die to create
I simply glued it on and then cut around the edges


I set that aside for a moment.
To create my Bee I used another Stampotique stamp (Large Bee) 
I stamped my bee onto white paper, embossed it with clear embossing powder and then colored and cut out


I then stamped my bee again onto a clear piece of thick plastic, I used Stayz on ink for this. StazOn works best for slippery surfaces


I added a tad bit of color to the wings with colic markers
I colored on the plastic on the side without the stazOn ink, it helps to not smear the ink


I then cut out only the wings


I glued the middle of the wings to the 1st bee that I had created. I can bend the plastic just so, so that the wings can stand up


I glued my Bee to the bottom corner of the puzzle piece


You can see how the wings stand up, I love this effect, so easy to create too


I dabbed a piece of white paper with brown archival ink and then stamped my sentiment with black ink


I then cut out the sentiment and added dimensionals to the back so that it would stand up a bit


Here is my finished 2nd piece


and here are the two pieces together


I will take a photo of the whole puzzle together next week. I also have to remind myself to take more photos of the steps. I know on the first piece, there were not many photos, sorry about that.
Take care and enjoy the rest of your week!!
CHEERS!

Monday, December 22, 2014

Altered Playing Card Challenge Week 15!!

Welcome back to the blog everyone and another week of the Altered Playing Card Challenge. This is week 15 of the challenge and I'm so enamored by what everyone is making and doing with these.


If you have missed any of the previous week's here are the links

and our Facebook page

and the Pinterest Board link

Pinterest Board

For this week's challenge, I decided to use Embossing paste on both of my cards. 


I wanted to use both white and black embossing paste and I went with the Wendy Vecchi paste because it's what I have in both colors AND I love the texture and smoothness of her paste.  If you have other brands, go for it! Use them!

I picked a few stencils and used taped it in place over my altered playing card
(this is a Dylusions Stencil)


I did not want to use the entire stencil, just a portion. So I added a piece of scratch paper over some parts and also taped that into place.


I then used a knife and smoothed my embossing paste over the stencil. I always add mine on in the consistency of buttering bread. Not too much.


When your all finished just lift your stencil directly up and then set that aside to dry. (I had previously drawn some circles into my gesso too)


I repeated these steps with my second playing card as well. This time I used the white embossing paste and a different stencil


After both cards had dried really well, about an hour,  I sprayed both backgrounds
For the first card I used Adirondack Sprays and the second card I used Dylusions Sprays. It doesn't really matter what sprays your using I just wanted to use the different sprays in order to show you that they worked the same


I let those dry once again
Once they were completely dry, I started with the backgrounds.
On the first card (with the black embossing paste) I wanted to highlight those circles I had drawn in the gesso. I used a Dylusions stamp set


Using black ink, I inked up one circle at a time and (without a stamping block) I stamped one circle at a time directly onto each of the drawn circles in order to highlight them


I then took my white geli pen and drew over the black circles. Now, the neat thing about spraying ink over the gesso is that when you draw with a white geli pen onto the embossing paste, the white pen ink turns the color of the sprays over the black embossing paste. It's so cool


See how my white pen turned the colors of the spray? I love how at the top it turned the sort of burgundy color and as it goes to the bottom it turns to the green


I also used the white geli pen on the other altered playing card as well. For this one, the geli pen white ink turned to the blue background colors as well.


I wanted to add a touch of black to my background so I took a marker and I outlined some blocks with black too
I also went around my edges with black as well
Now since I used the white embossing paste on this card, the white took on the colors I sprayed onto the background BUT the blocks are raised so it really gives this cool effect to my background.


Once again I took my black marker and doodled a bit onto my background in the spaces where there wasn't much going on


I picked two Stampotique images, Carrot and Daniel's Tree Topper and stamped them onto separate white paper. I also clear embossed them so it would be easy to color them with copic markers. (when you emboss them, the black ink doesn't run when you start coloring them)


I cut them out and applied them to my background
I also added stamped sentiments as well

Here are my finished cards for this week


The embossing pastes really give the background a fun raised texture and I just love using it. I hope you enjoy this week's cards as much as I did.
Have a great week and Merry Christmas to you all!!!!