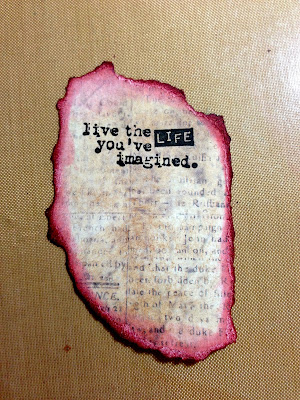
Live The Life You've Imagined!
This is one of my favorite sayings and it's on a few Tim Holtz Stamps, I decided this was the saying that I wanted to go with for this tag.
For the project today, I entering the following challenges:
SanDee & Amelia's Steampunk Challenge - The challenge over there is "Altered Playing Cards", this is my first time playing with them and I am really having fun with it. I will have to play more often with SanDee and Amelia
Fun With ATCs - Texture is the theme there and I created texture with the embossed metal and my playing card is ATC size.
To start with this tag I sanded a little bit onto my playing card to give it some tooth and prep it for the Distress Paint.
I then went over the entire card with some peeled paint - Distress Paint, I wanted to card to show through and it worked perfectly. I also went around the edges of the card with black soot distress ink.
For my tag I dabbed several colors of Distress paint onto my craft sheet and spritzed with water and then ran my tag through.
I also stamped with Archival ink and a Tim Holtz word stamp
I used more paint dabbers in several colors for my cardboard pieces that I used. These turned out so cool, I just love how the colors run together.
I used metal tape and several alcohol inks and a Tim Holtz clockworks embossing folder to create my piece of metal. I also went over the top after it had been embossed with Black Soot distress ink.
In order to create a pocket (so that the playing card can be pulled out) I only tore off the paper backing of the tape in the areas I wanted to stick to the tag and left the rest of the brown paper.
I used a piece of card stock with writing on it and colored it with distress inks. I stamped my sentiment with Archival black ink. The sentiment is from the Tim Holtz stamp set called "Odds and Ends"
Lastly I used apiece of Tim's tape measure ribbon and stained it with a combo of distress paints and alcohol inks to colorize it. I'm sorry, forgot to photograph that part.
I added some other elements and lots of Tim's Findings
This is how it all came together... (notice the measuring tape on the right side here)
I hope you enjoyed the tutorial for today, please feel free to email me or leave a comment if you have questions. I really try to answer all question and usually reply to all comments.


So cool. Love the colors.
ReplyDeleteThat is fantastic Claudine. So glad you do step by steps to show all the work that goes into creating your projects. Hugs, Jenny x
ReplyDeleteHi Claudine, wow love this tag, and indeed great that you've shown us the steps for making this. Thanks for sharing. Hugs Frea
ReplyDeleteHi Claudine, Lets play cards and have tea. What a wonderful project and as always I love your work.
ReplyDeletePatty.
A fantastic tag, Claudine!
ReplyDeleteLove all the details and materials you used and the stepxstep too! Thank you for sharing this with us at SanDee&amelie's Steampunk Challenges!!! (Hope to see you with playing along with us more often then ;)
Hugs,
die amelie x
Love this!!! The playing card alteration is fabulous as is the metal! So cool!
ReplyDeleteDear Claudine, thank you indeed for showing this amazing Project on the SanDee&amelie´s STEAMPUNK CHALLENGE.
ReplyDeleteJust brilliant you show the work in process as well!
Thank you indeed!
XOXO SanDee1899
A cool make!
ReplyDeleteThank you for playing along with us at FunwithATCs!
Claudia x
Very cool indeed! Love the metal and the torn piece with sentiment.
ReplyDeletelovely colours. the embossed metal looks great. the treatment on the card looks fab. thanks for joining us at fun with atc's
ReplyDeleteLove how you incorporated the playing card into the tag. Wonderful colors.
ReplyDeleteVery cute! Love your idea of the pocket on your tag! Beautiful!
ReplyDelete