Pages

Showing posts with label punchinella. Show all posts

Monday, May 25, 2015

Altered Puzzle Week 5

Welcome back to the blog, it's Memorial Day today so Happy Memorial Day everyone!! 
We are onto week 5 of the Altered Puzzle Challenge and starting row #2 


Here are the links to the previous posts for this challenge


Our Facebook group is here:

This week we are starting on the second row to our puzzle, pieces 7 and 8.. I decided to go with something simple for these two pieces since it's a holiday week


starting with piece #7 I began by using Dylusions Sprays and 
a water spitzer, first spray the puzzle piece with water and then spritz with Dylusions, I just kind of let the colors run


Once everything is dry I used a piece of punchinella (you can also use any stencil) and my black Zig marker to create circles here and there


I then used my white gelli pen to doodle a bit


I used a piece of gelli print leftover paper to cut out some triangles for the edges 


I then used my Zig marker again to doodle
(if you haven't noticed I love to doodle) 


Lastly I printed out my sentiment, cut out, edged and glued
This is my final piece


For my next piece I began by using Archival Ink in a brown color and a stencil 


I also edged the puzzle piece with the same ink


I added some black wash tape here and there


I then used some of Tim Holtz Chitchat stickers for my sentiment
I also used Tim Holtz framework die to create the little chevron across the front


I used my white gel pen to outline my "ok" word which was created using black card stock and a Tim Holtz die


Here is my finished piece


Here are my two pieces together


These were fast and simple but the outcome is no less exciting. I hope you have fun creating your pieces for this week and enjoy your Memorial Day!! See you next week
CHEERS


Monday, February 2, 2015

Altered Playing Card Challenge Week 21

Can you believe this crazy weather? I wish all those people on the east coast well, I hope you all are warm and safe.
This is week 21 for our Altered Playing Card Challenge!!


If you have missed any of the previous week's here are the links

and our Facebook page

and the Pinterest Board link

I told you last week that we were going to use clear embossing paste this week and so we are.
I really like clear embossing paste and I don't use it enough
For starters I used stencils along with the paste to create some texture in my background, you just smooth it on like embossing paste


You have to set them aside to dry, I let mine dry about 2 hours. I think you can heat set the paste, just be careful 
Once the paste was dry I took my first card and used Dina Wakley paint for my background. I used a sponge and just dabbed it on (note: if your not into bright colors please feel free to use more muted or neutral colors, your cards are yours so please make them the way you like them)


before the paint dried I took a baby wipe and went over the raised areas and wiped the paint off


Again with another color

Paint and then wipe, this is how my card ended up

for my second card I used the DecoArt media paints.. Same technique, dab on and then wipe off
 The DecoArt paint didn't wipe off as well as the Dina paint but I really love how the gesso texture came through as well as some of the stenciled embossing paste

I like the clear embossing paste because it almost looks translucent and when you wipe off the paint it leaves the stenciled pattern.. 

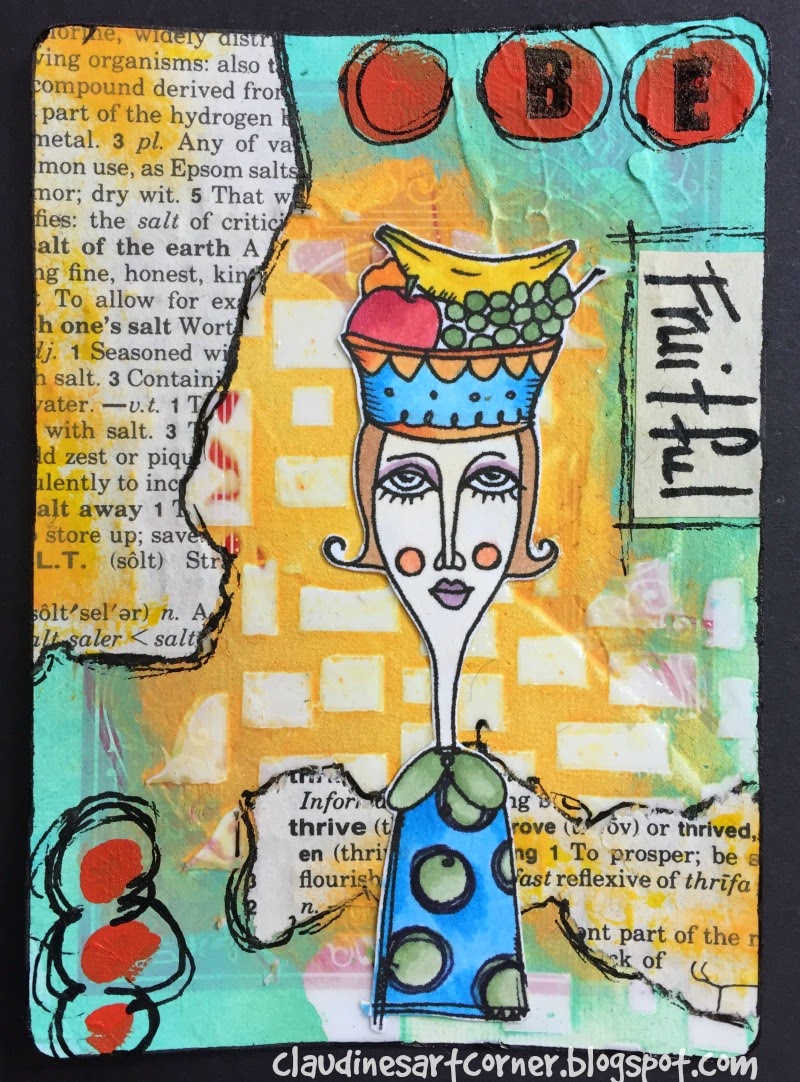
For both of my cards today I am using images from Vera Lane Studios, these ladies are called "Housewives"

After making them the sizes I wanted, I printed them out and then colored them with Copic Markers. I then cut them out

Back to my first card:
Using the DecoArt paints again I dabbed a bit onto my craft sheet and used my pinky finger to make some dots

I then used some torn book pages and added that here and there, I just used glue stick to adhere the pages, I then trimmed the edges
Using my Scarlet Lime journal pen I drew around the edges of my torn pages (I cannot find a link to this pen, I hope it's not discontinued!)


I have all these mini alphabet sets from the Michael's dollar bin, gotta love that dollar bin...
 I decided to go ahead and use one here, I used black ink and stamped the word "BE" onto my circles... I also used my black pen to draw lines around my circle
I then wrote "fruitful" on a piece of the book pages and adhered that to the side


I then adhered my girl, I decided to add another set of circles in the lower lefthand corner and did a little doodle with the black pen LOL... 
Here is my first finished Altered Playing Card


Getting started with card number 2 - I first added a few dots here and there with paint and my finger


I have this zip lock baggie full of used stamps from the US and several different countries and I dug through and found three that I really like, I then used my glue stick to adhere them to my background (I always cut my stamps off the letters I receive for use on other things)

Again, I used my Scarlet Lime black pen to doodle and also drew around my stamps
I also added a tiny bit of yellow paint to my dots at the bottom of my card and tiny bits of orange dots to my upper circles
I added some black tissue tape to a piece of white scratch paper
This is going to be my background for my girl
I adhered my girl to the tape and then cut around her leaving a small portion of the black as an edge


 I then glued my girl onto my background, love the way that black tissue tape makes her stand out

Using some punchinella and a black ink pad, I created some circles here and there

lastly, I added my sentiment (Love Robin Roberts!)
Here is my finished 2nd card


and here are both playing cards side by side


and last but not least the winner of last week's give-a-way is:

I have base coated 37 cards to play along. I ran out of paint. 14 more to go. I'm going to try a valentine theme. I love this idea! I am going to hang them all up as a banner when I finished.

Congrats Paula, please email me at: 
jasminngirl411 at yahoo.com 
with your mailing address for your prize

Thanks all for stopping by, make sure to share your creations with me if your making your own set of cards. I always love seeing what you all have created.


Tuesday, December 3, 2013

Christmas Ornaments - Take 3

Hello again everyone, for my last post on Christmas ornaments (for now) I wanted to do something for my kids, I make them an ornament every year and it's become somewhat of a tradition. I really wanted to try something similar to an ornament I saw on pinterest. (love pinterest for ideas!) I used some clear plastic ball ornaments that I bought at Michael's. 
I use plastic so that if anyone drops one they won't break. 

Just like the on the first day, I started by sanding these just a tad in order for the gesso to stick


I then applied two coats of gesso

Once completely dry I used glue and seal and applied bits of torn book pages here and there. This is a messy job so make sure your ready to get your fingers dirty. LOL


I actually used pages from the book 20,000 leagues under the sea by Jules Verne that I got at the thrift store. The book pages were nice and distressed and old looking and since I already have a nice copy, I used it. I already love the way this looks


I then used my Faber-Castell oil pastel crayons to draw hearts and went around with a black outline. I really like the Faber-Castell oil pastels, they are permanent and you can use a finger to blend them. They are awesome and turn out so vibrant.


I ended up drawing three hearts, one purple, one red and one orange
I then added some dots here and there with punchinella and black Archival Ink  


I didn't take a photo of this last step, but I used Tim Holtz Mirrored sheets and his Christmas Stacked Words die to make the word JOY. I applied a bit of the glue and seal to the back (even though it has it's own sticky back, I need more adhesive for the rounded ornament) and added it over my hearts. 
For my last step, I coated the entire ornament with Claudine Hellmuth's Multi Medium Gloss to give it a nice shiny look and also seal everything

Take a look


I made three of these, one with hearts, one with stars and one with butterflies. 
Thanks again for stopping by, have a great day!!